Your First Dress in Dressmaker: Step-by-Step Walkthrough
A complete walkthrough of making your first dress in Dressmaker, from opening sketch to delivery — with the mistakes to avoid at every stage.
Your first dress in Dressmaker sets the tone for everything after it: it is where the game teaches you that a dress is a process, not a single screen. This walkthrough follows the full journey from sketch to delivery and points out the traps new players hit at each step.
Step 1: Read the request before you open the sketchbook
A customer asks for a dress for an event — and beyond the event, each townsfolk has individual tastes. Before designing anything, answer two questions: what is the occasion, and what does this person clearly like? Write the answers down if you need to. The whole dress is judged against that brief, and it is much cheaper to re-read a request than to re-cut a skirt.
Step 2: Sketch it first — and commit in the sketch
The sketchbook is where Dressmaker lets you make mistakes for free. Sketch the silhouette, choose your colours, and attach fabric samples and appliqué ideas while nothing is irreversible. Two beginner rules here:
- Decide the colour story in the sketch, not at the decoration stage. Decorations can be improvised; a colour palette cannot be un-sewn.
- Match the sketch to the customer's event. A design that reads "grand ballroom" will fight a request that reads "village picnic", however pretty it looks on paper.
The sketchbook spread makes this concrete: the request on the left, the requirements it will be judged by, and the part pickers on the right — plus a fabric estimate ("approx. 3.85m") before you spend a single coin.
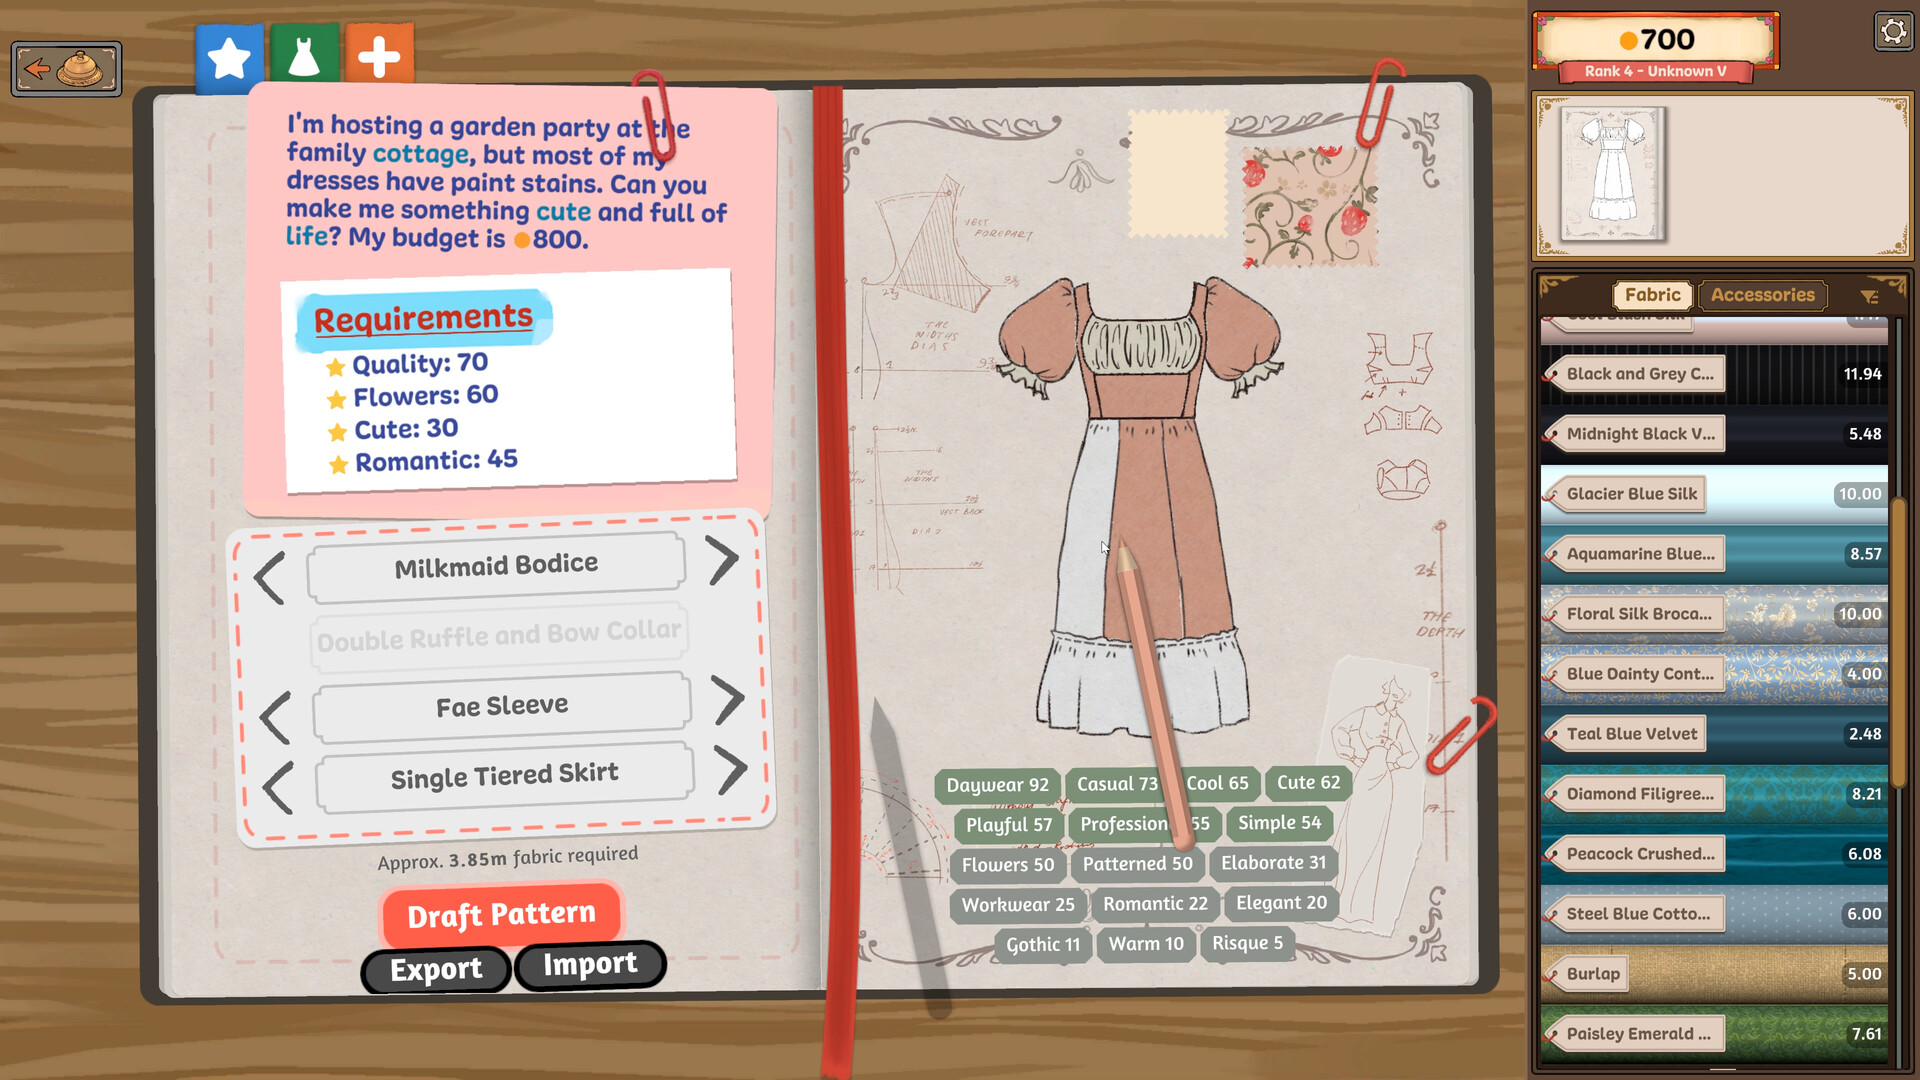
The sketchbook spread: request and requirements on the left, style parts and style tags on the right, fabric list at the far right.
Step 3: Buy fabric you can afford to ruin
Buy from the range of fabrics — cotton, linen, wool, silk and velvet — but for a first dress, buy forgiving cloth. Cotton and linen behave predictably under the cutting wheel and the sewing machine. Expensive fabric magnifies every wobble; there will be time for velvet once your hands are trained.
Buy slightly more than the pattern needs if the game allows it. Layout mistakes are the most common first-dress failure, and spare cloth turns a disaster into a do-over.
Step 4: Lay out the pattern with the grain in mind
This is the step that decides how the finished dress looks. In Dressmaker, whether a pattern piece is aligned to the grain or cut on the bias changes what appears on the final dress — so placement is a design decision, not busywork:
- Keep large panels aligned the same way unless you are deliberately going for a contrasting effect.
- Bias-cut pieces drape differently; if the customer asked for something flowing, a bias cut is your tool for it.
- Pack pieces tightly to save fabric, but not so tightly that you overlap a cutting line.
Preview the arrangement on the mannequin before you cut. The mannequin is the cheapest possible place to discover a layout mistake.
Step 5: Cut once, calmly
With the layout confirmed, cut. There is no prize for speed here — the only irreversible thing at this station is the cut itself. Follow the pattern lines; if your hand slips, stop rather than "just fixing it on the sew".
Step 6: Feed the sewing machine steadily
Dressmaker's sewing machine is tactile: you feed the fabric through and the seam records how it went. The two failure modes are feeding too fast and letting the fabric wander sideways. Steady beats fast, corners beat curves, and if the game gives you a guide line, trust it over your instincts. Uneven feeding shows on the final dress — which is fair, because it would in real life too.
Step 7: Decorate with restraint, then one flourish
Buttons, bows, appliqué and lace trims can go wherever you like. That freedom is the game's gift to your taste, and the trap for new players: more is not more. A good rule is one focal decoration (a bow at the waist, an appliqué on the skirt) plus supporting details elsewhere. If everything is decorated, nothing stands out.
Step 8: Deliver, then look at what you made
Turn the dress in. The completion dialog gives you three choices — complete the commission, keep working on the dress, or sell it off the rack at a displayed price — and a finished delivery earns coin and reputation. Compare what you sketched to what walked out the door, and you will know exactly which guide to read next — cutting, sewing, or decoration.
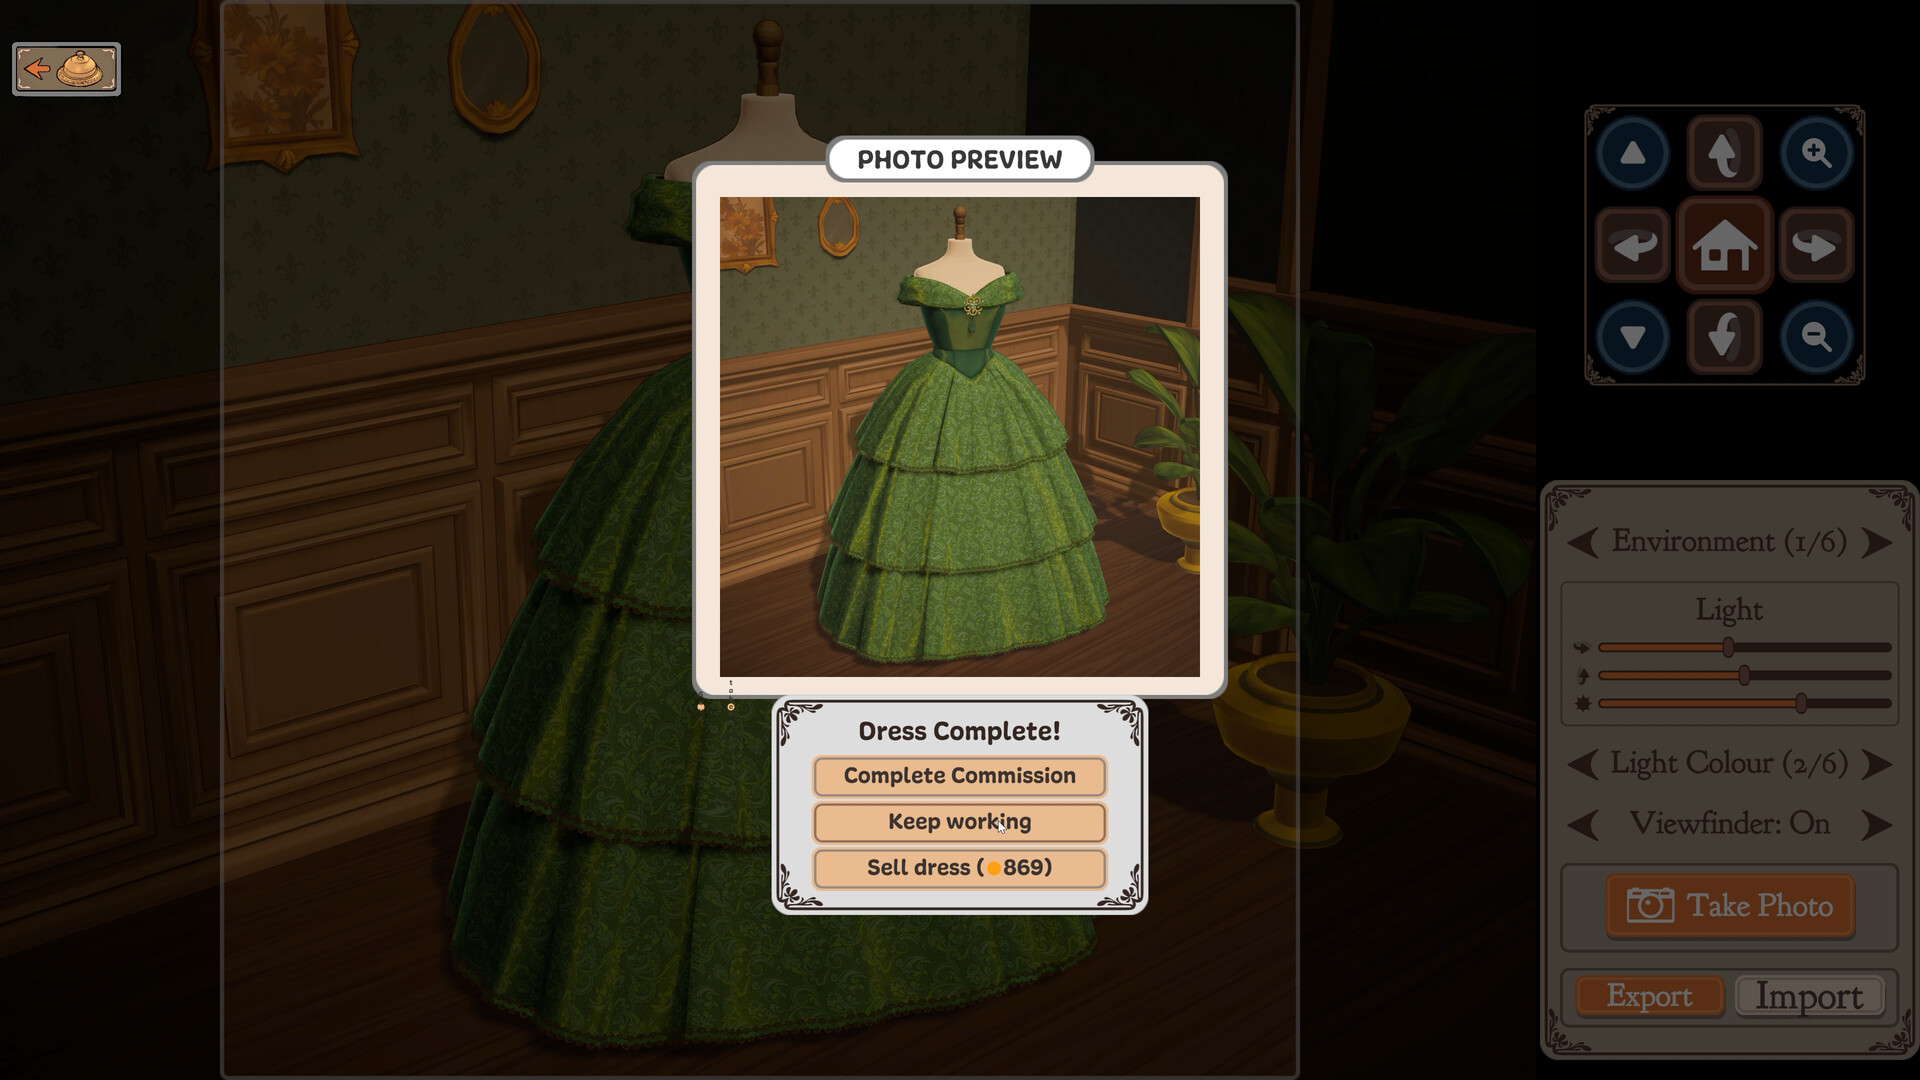
The moment of truth: "Dress Complete!" offers delivery, more work, or an off-the-rack sale.
Common first-dress mistakes
- Designing for yourself instead of the customer. The brief wins.
- Cutting before previewing on the mannequin.
- Buying silk or velvet for a first attempt.
- Rushing the sewing machine. The seam is the signature of the maker.
- Skipping the shop window. Off-the-rack sales keep coin flowing between commissions.
Take it slowly. Dressmaker is built for care, and the town has plenty more wardrobes waiting after your first happy customer.
Game screenshots: Dressmaker © Cozy Lives / Free Lives.